Saturday, February 28, 2015

Year of Projects Week 09

Not much to show as far as pictures go for this week.

I finished the test knit, and will show the pictures as soon as the pattern releases. I'm very pleased with the results, that much I can tell you.

The blanket in progress is growing nicely. I just started on ball #7 (out of the 10 that I have), but really it looks just the same. I may still get used to the thick needles and yarn.
The log cabin block afghan is still on ice until I can buy more yarn to make it bigger.

I did however finish another 3D snowflake -White Majesty- and since this is a project of doing something every month for a year, I figured I'll add it to this list for tracking here too. I will add it to the 'master list as well. Updated and added to the bottom of this post.


I'm looking at what I've done and what I have in the works so I can plan for March. the first thing to finish will be crocheted scarf, then I have at least one 'fun' project to do. Just something for a smile and a giggle. More details on that when I get to it. It is a surprise 'smile gift' for a friend.


My Year Of Projects  To Do list


My list is very flexible I’m ‘afraid’ I’m forever changing my mind mid-stride ;)
  • I hope to make at least 6 Feel Better Friend Dolls ( the yarn arrived late January) -sample one done -the rest are 'on ice' for know, possibly indefinitely)

  • I would like to finish the afghan started early in December (that's the one featured above -log cabin block squares) Coming along with 12 blocks done. 12-15 for the final count with some borders also to be added. This will take  while yet, as I need more yarn to make more blocks.

  • I want to knit 2 pairs of socks 
  • I need to knit a blue/aqua scarf for myself Finished this January 31st.

  • At least 3 pairs of flip-top mittens (2 will be gifts) I changed this to 2 pairs of mittens and one scarf (which is crocheted and I have already started on it), Started a pair of (fingerless) mittens the third week of February.-Finished- (Ravelry test knitting)
  • Set of 12 3D snowflakes, from the book 'Dimensional Snowflakes' Making them 1 per month at least.
Done :  01 Crown Jewels, 02 White Majesty,


Friday, February 27, 2015

Snowflake - 3D Crochet

It's then end of the month and time to finish the next crocheted snowflake from Dimensional Snowflakes  I got this one started early in the month, but only finished it off this week. Maybe next month I'll get to it sooner and avoid the end-of-the-month-rush to get all the things done!

This flake is called White Majesty and it sure is a pretty one.


The 3 parts completed and still looking a bit wonky...


Pinned and starched with a glue & water mix. The 2 smaller ones are pinned at a 90 degree angle


It seems that 24 hours is a good time to leave them to dry and now they are ready for the next step.


I glue one side on, using Aleene's Tacky glue. It dries quickly, clear and remains flexible. Exactly what I need for this. a fabric glue would also work well I expect.


Once the one side is dry enough, I add the other side and perch the flake onto a 90 degree piece of wood.


Adding extra blocks to keep the pieces in the right places until the glue is dry.


And there it is, White Majesty is ready for a hanging thread


And here are the 2 flakes getting acquainted.  I still need to find a place to store these...


Thursday, February 26, 2015

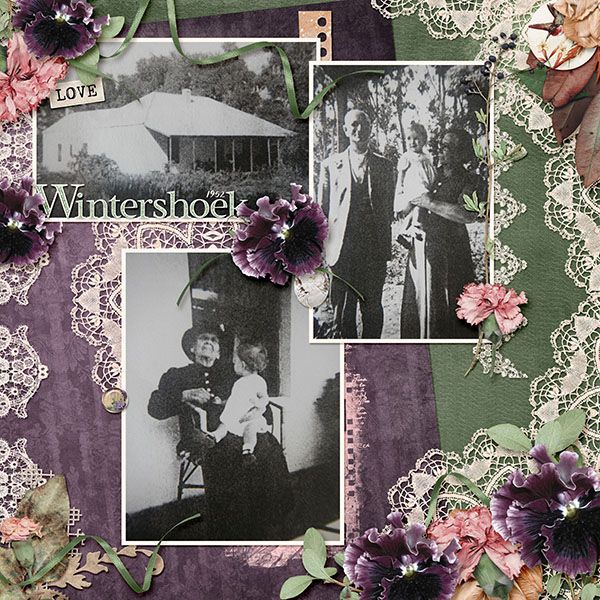
Scrapbooking - Family Farm

Wintershoek. Family Farm. Memories.

Poignant pictures of my family and what was the family farm. If every picture tells a story, this page is a short novel.


I used Lonetta Avelar's new 'Sweeping Hearts Collection' for my page. Remember that the pieces of the collection are available separately if you don't need all the goodies right away...


Happy Scrapping! :-)

Sunday, February 22, 2015

Year Of Projects Week 08


I did not much to show for this week....the soft fluffy blanket is about halfway (as far as the yarn that I have is concerned, who knows but that I may change my mind and add to it, once I finish up what I have!) and seeing as it looks just the same, I did not take new pictures. I still find the thick yarn and thick needles unpleasant to work with.

Far more pleasant is the test pattern I'm working over, over at Ravelry. It is really nice that I can end up with mittens matching the scarf I made, plus I get to use the remnant yarn and I get to take an item off my list. Not bad getting  3  'flies' with one swipe...

...and the pattern test I'm working on...


I've finished the first mitten and hope to start the next one later tonight. I really like how these are turning out!

And other than turning my drawers inside out looking for my cable needle...that's been it for my knitting escapes this week!


Saturday, February 21, 2015

Heritage Scrapbooking

I think the pictures in the firts LO must be some of the oldest that I have. All family history. Not pretty, but then war never is pretty is it?

Merebank


This picture of my sister makes me smile! In the harsh african sun that big hat is a good idea, I assure you!

Big Sister


I Used Kimberly Stewart's new 'Kissed By Spring' kit for both my pages.


Love this kit, it has so many of the things in it that I love using on my pages!

Tuesday, February 17, 2015

Christmas Photo Album

Every year over Christmas we take a family picture. This is a 'tradition' we started when our first son was born and we're still doing it, even if we are not able to all be together over the holidays. I thought it would be nice to have a pretty album to house all those pictures. Something can can be a keepsake and also be 'decorative' over the holidays.
I really really liked the look of the Graphic 45 '12 Days Of Christmas' Collection. The papers are beautiful and the little extras charming. Plus - it is not overly cute nor too frilly (for a house with more guys than girls!) I like the traditional colours and the touch of dramatic black is perfect.
I settled on using that for my album and decided to make my own album from scratch. I have some ideas of pages I want to make. I have a line up of idea I found on You Tube and then I found a very nice 'foundational' cut set to get the ball rolling.  The December Album files from Designs on Cloud 9 (these are still available here until the end of February 2015, after that date it will still be available at Michelle Currie's Silhouette Cameo store HERE)

I set out cutting a few pages and a bunch of words , borders and shapes 


I've only just started decorating some of these. It is a long term project, but I'll be updating this as I get stages done. I want to take my time to enjoy the process of making it and being pleased with the end result.


I'll be posting updates to this as I get pieces done.

Monday, February 16, 2015

YOP - Week 07


I'm a little late in posting this (this is last week's update) but I just didn't feel like doing this on Sunday afternoon. The book I was reading was much to interesting to stop for a blog post ;-)

Good news is that the needles finally arrived (a couple days late, but that's ok! Patience is a virtue ;-) ) and I made a start on the blanket. It knits up really fast, but I'm not enjoying the thick needles (9mm) it feels awkward and clumsy and is definitely harder on the hands and wrists than thinner yarn. But it is a perfect project to pick up 'whenever' I like to have projects like that at hand.


I also got on with the job and almost finished the 'Feel Better Friends' doll. She just needs to have her hair done. Maybe later today...see  why she needs a stylist?
I gave her 'built in' knickers too.


I opted for embroidered eyes for this one. Safety eyes are also an option. She's having a nice lie on the soft blanket in my work basket :-)


All dressed up and ready for the finishing touches.


And so onwards into a new week we go! Thanks for stopping by!

Edited to add : I also finished this wall quilt (22 1/2" squarish) Although not on the YOP list, it took time this week :-)


Saturday, February 14, 2015

Valentines Card

I'm relying on the clean and simple design to pave the way for the sentiment, that I think says it all.

I used a cut file by Designs on Cloud 9 for the front panel on the card. This I sprayed lightly with alcohol inks to set it off just a little from the background.


I cut a same size heart shape as the panel, through the front of the card, and stuck a felt heart inside the card so it will show through the opening. 


The sentiment is from AA Milne's 'Winnie The Pooh' Milne had a way of saying things so very well using his characters from these stories. This quote is no exception. I got the Silhouette Cameo to write it for me.


I love you my hubby of 30 years and counting. My life is so much richer because of you.


Hope you have a fun filled Valentines!

Thursday, February 12, 2015

Sewing - Improvisational Quilting

AT the end of 2014 I attended a live quilting class on Creative Live. The class was called "10 Ways to Love Improvisational Quilting" and presented by Malka Dubrawsky.  I've been interested in quilting for a while, but traditional quilting, though beautiful, never really inspired me. Malka was hardly 10 minutes into the class before my curiosity was peeked. By lunch time my fingers were itching to get started.

All I can say is that I completely enjoyed the process. (I thought Malka taught very well and very clearly btw, and the course is available for purchase at the link above if you are interested.)

With Christmas coming up, and a bag with small to very small pieces of scrap Christmas fabric I decided to try my hand at this 'improvisational' quilting idea. 

I wanted a focal point and decided a poinsettia would be good, partly because I have the fabric for that(yellows and reds) but also it features in some of the scraps. I searched the internet for a poinsettia quilt block design, and started to put my pieces together.


Now the whole point of improvisational quilting is that you don't measure and you cut freehand. Which - naturally- means that you will have endless inconsistencies and uneven edges/sizes etc. You can see that clearly here in my pieces. Smaller scraps are added to fill the 'holes' until you have a block piece that can be trimmed to fit a space you have for it. This method means that you continue to design all the time you piece. You make decisions and adjustments all the time. Colour, shape and size is all decided as you go along. I only knew that I wanted this block in the center, that I had a limited amount of fabric and the theme is 'Christmas'

See what I mean by filling in with small pieces and edges that are not straight?


The central yellow square was added and all the blocks sewn to that. Bottom right shows a filler piece sticking past the edge.


And here the edges are all trimmed to leave an (almost) square piece. I just wanted straight edges to continue on, not a square.


Next I added an even (mostly!) strip of the same fabric to frame my block, followed by a series of half square triangles. Inconsistencies abound, mostly because of the sizes of fabric that I had to work with.


Lastly I added strips of green and red in between the half square triangles to make up the gaps and filled the corners with yellow accent pieces. 
Then I framed the piece again, this time with poinsettia fabric on the sides. I did not have enough of that to do the corners too, so the holly fabric filled those gaps.


And that was all the fabric I had.

Next up was quilting it but I had to wait for a walking foot that I had ordered to be delivered before I could do that. The batting I had was too thick for a regular foot.

You can see the finished wall quilt below.

That was literally the only fabric choice I had for the binding, everything else was too small. It measures roughly 22 1/2 " square (57cm) I say 'roughly' because as you can see, it isn't perfectly square. I opted for that, rather than trimming that outer strip of fabric. I thought my eyes would live better with that option.


It is a wonderfully warm and bright splash of colour and will really brighten dark December days in the future.


I have another top pieced and should have enough fabric for one more....will that be the end or the beginning of my quilting journey...I wonder...

Tuesday, February 10, 2015

Cards - Valentine, Friendship, Birthday....

Really I think these little cards will do well for just about any occasion. Which is why I have not added any sentiments to them yet.


I added a bit of stamping to the background (card front) and sprayed it lightly with alcohol inks. Next I layered a paper doily, before sticking the 'library' pocket down. I had trimmed the pocket with a piece of ribbon beforehand. The stamped kitty image is from Penny Black's, "Every Which Way"


The other card has a background of ink sprays (I really like the soft colour these inks give me!), again with a paper doily on top, under the pocket. This time I also sprayed the pocket.The stamped kitty images were coloured with coloured pencils.


I used the 'Library Pocket' Cut file from Designs on Cloud 9 to cut the pocket and matching (red) tag. I could also include another tag or item into the roomy little pocket.


Monday, February 9, 2015

'Mail Box' Box Card

I'm still having fun with the SVG Cuts 'Heart's Aflame' box cards.


This one was ridiculously quick to cut and put together....and turned out so pretty! I again used papers from the 'Sugar Plum' Paper Pack by Recollections


The box is nicely 'stuffed' with mail on the inside!


Since I used the same paper throughout, my 3 pieces now make a nice little set.


The 2 Box cards are from 'Heart's Aflame' and the pop-up card is from 'Hugs And Kisses'

Heart's Aflame


Have a wonderful week!