Monday, February 13, 2017

Just Add Colour

Or color if you prefer ☺

I'm not new to colouring (I have done this all my life), colouring books (I still have one from elementary school days) or coloured pencils (I am a coloured pencil artist) so it should be no surprise that I have embraced the current colouring trend with enthusiasm.

It is sad to see how much sub-standard work is available for sale and how much downright junk is available too. However there is a very good selection of excellent books available, so that there is plenty for everyone and every taste to choose from.

For me hardest of all was to get used to just colouring and not caring much about the outcome of the picture. I still have to remind myself regularly that this is not going to be framed, nor is it heading for a gallery. In fact it doesn't matter one bit whether I finish it or not! It has surprised me how hard it is to get used to such a different angle.

I also promised myself that my good, professional quality pencils will stay in the studio while other pencils, especially those from high school years (gasp) will be available for the books.

I 'fell in love' with a book from Dover Publishing as soon as I started looking around for something new to colour. I like needlework, I like history and I like to colour so this choice - Medieval Tapestries- was a no-brainer.


The images have beautiful clean lines and although the paper is light weight I think it will take pencil very well. I have not actually coloured in the book itself yet. Instead I copied, and enlarged an image because I wanted to use watercolour pencils and did not want to damage the book. Good decision...the paint would certainly have stained the other side of the page as it bled through.


The colouring is nothing special and the regular copy paper certainly has it's limitations, but I sure like those designs and it adds a pop of colour on the wall of my craft room.


I used Derwent watersoluable pencils and that 'ancient' box of Faber Castell pencils, dating back to the late 70's...


And here is a more playful take on the colouring process, featuring some giant pencil boxes..


And a few more pages - same technique and materials. These are loose and you can clearly see how much the copy paper warped from the wet media.


Enjoy!


Friday, February 10, 2017

In Father's Footsteps

I found this picture post card among my mother's papers after she passed away. I had forgotten all about it, till then! Oh the memories! She loved the humour in this and would chuckle away delightedly whenever she showed it to someone. We all have those little things that just get our funny bones, don't we?

I thought it would make a great page in the Family photo album since we all remember this so well.

I used the mini kit "Beautiful" by Cathy Krenek for my page. The template is from the Gingerscraps Template Challenge for February 2017


Such a pretty kit and the colours matched that post card perfectly! "Beautiful" Mini Kit by Cathy Krenek


Tuesday, February 7, 2017

Snail Mail Greetings

A little while ago I won't a Tiddly Inks Challenge. You can see my entry here - "Got Chocolate?"
To say I was delighted is an understatement, so I high tailed it over to the Tiddly Inks Store with my gift certificate and snagged some goodies from my wish list.

One of them was the Snail Mail Wryn set. The set contains 5 different digital images all featuring snails. Really cute, and a good price too.


I coloured the image using coloured pencils, my favourite way to add colour to just about anything (closely followed by water colours) For the card base I used a woodgrain stamp (by Heidi Swapp) and Treebranch Archival Ink by Ranger and kraft card stock.

Next I made a cluster with designer paper, some tissue paper, crumpled and torn to give it some texture and a die cut lace strip. These I sewed together using black thread. I then added the cluster to the card and finished it all off with a banner, stamped with a sentiment (ProvoCraft) and stapled to the card. I found those purple staples a few years ago in my local department store. Sometimes one finds the nicest goodies in unexpected places!


And 'Wryn' is ready to be on her way taking love and best wishes with her.


Tuesday, January 24, 2017

This is a Gloop

A Spotted Bellied Gloop to be more precise.


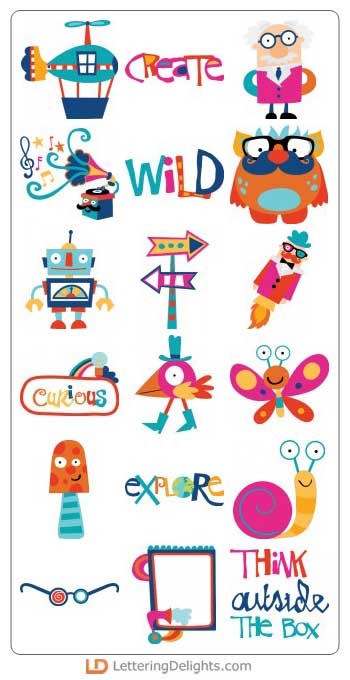
I got it from the 'Curiosity' Cut set over at Lettering Delights. (affiliate link) And I liked the colours so much, I stayed pretty true to them.


I've had this set for a long time, and every time I see it, it begged to be made into a 'hello' or 'hi friend' card. 

I'm glad I finally have Gloops on the desk...

Do you see the reflection on the glasses of the Gloop on the right? I put acetate behind the frames to help my Gloops see better. No pretend glasses around here, no way...


And here is that cute goofy face up close. I wonder how many different types of Gloops (or is it Gloopi?) there are...hmmm


Friday, January 20, 2017

Lovely Little Jane

Not her real name...names have been changed to protect the innocent...LOL...

My lovely niece, back in the 40's. I just love this picture.


I used Cathy Krenek's new kit 'Be An Optimist' for this page. It is so pretty and just what I needed for my girlie girl picture!


At $2.00 while part of the Gingerscraps Buffet, this kit is a bargain!

Tuesday, January 17, 2017

Milestone Birthday

90 year young. That sure is a milestone to reach!

So what sort of card do you send a flower lover for her 90th? A box full of flowers of course!


I cut my box for the flower bunches from kraft card stock and stamped the woodgrain on using brown dye ink and a stamp by Heidi Swapp that I picked up from Michaels.

And really once that was assembled all I needed to do was decorate the different inserts and that was done with cut file flowers and punches pieces. I did add a lacy die cut to the front of the box to soften the design and to bring a bit more white in, while repeating the lace detail of the doily on the back panel.


A little organza bow finished of the tag. Besides, who gives flowers without any ribbons or bows, right? I love all the dimension these box cards have.
We added a sentiment and handwritten notes to a panel at the back of the large panel on the card.


I used :

Christmas Box Cards - SVG Cuts (affiliate link) Mary includes plain box cards for you to customize. For my card I used the Christmas Tree Box Card style.


In Bloom - Lettering Delights


Friday, December 9, 2016

Snowy Christmas

Quite appropriately, it is white with snow outside my window as I type this...now if only we could have a little over Christmas to keep things really cozy! Family, a cozy fire in the wood stove and a winter wonderland outside. That's the stuff memories are made of.

But now - on to my snowy Christmas cards.

Lili of The Valley carries some truly beautiful stamps, honestly it is so hard to narrow my wishlist down. I opted for digital stamps but they also carry clear and rubber stamps and cross stitch patterns.

Since I like my cards to be displayed and they were going to travel internationally (actually 'back' to the UK!) I decided to once again make easel cards.

I started by sizing the images and sentiments in Photoshop, preparing a document for printing.  Still undecided about whether I wanted to use the car or the church scene I included both.


Once that was set-up I could print multiple copies as needed. 

The church scene was quick to colour, using coloured pencils, after which I trimmed the image out and attached it to card front which was prepared with patterned paper.


The inside of the card is also lined with a snowy paper, while the sentiment strip is edged with a holly punch (Fiskars) I added a couple die cut and one punched snowflake. Some puffy fabric paint (Tulip) gives the snowflakes on the panel dimension and while the paint was wet I sprinkled on a small amount of super fine light blue glitter.


It was a quick make and I'm very pleased with the result!

Next up was the mailbox - very appropriate for an 'across the miles' greeting.


I used coloured pencils for the colouring as well as a silver Sharpie pen for the metal details on the postbox. Another print of the same picture provided me with a mailbox to trim out and pop up on foam for dimension. I also popped the birds and some of the holly leaves up to add a bit of depth.


Once again I used the puffy fabric paint for my snow and added glitter for that frosty sparkle. I also added glitter to the berries and some of the leaves. This card did take more time and more 'fussing' with all the trimming and layering, but I enjoyed every minute of making it.


I thought the envelope shape on the patterned paper made a very fitting place for the stamped sentiment. Some punched holly leaves and glittery berries was all I needed to add.


Some understated green patterned paper and a couple die cut snowflakes provided the final touches.

Both cards are on their way right now and will hopefully remind dear people how much they are loved...