Nope, not this year!
Actually it's been many years since we did have one. Last year we had hardly any snow. Several years ago I found this action online that framed your picture and put it in a snow globe. I neer used it for a LO until now...
I used Cathy Krenek's "Merry & Bright" Kit and matching "Glittered Papers" for my LO
The template is from the Template Challenge #1 at Gingerscraps
Monday, December 21, 2015
Monday, December 14, 2015
Tree Decor - Wood Slices
A casual remark from a friend got me thinking...and playing.
And this was the result :
My friend commented on how perfect a log, in the bucket of firewood, would be for making wood burning ornaments. It did not take me long to ask hubby to slice the 'log' for me! However I found that the soft center of the wood (Big Leaf Maple) was hard to avoid and the darker areas really bugged me.
So I broke out the stamps and although the soft bits are still visible, I find it less obvious. Of course these pictures show them huge. The actual slices are only 1 7/8" tall (46mm), so in reality you have to look closely to see the imperfect bits.
This mouse image is 1.25" tall. (I touched up the black on the eyes and other parts of the image, after I looked at this picture. Now the lines and details are clear and crisp again)
I stamped them using Stazon ink and did the colouring with colour pencils.
I added a bit of glitter glue to some areas as well and embossing powders with glitter. For the puffy details on the birds' hats I used Tulip Puffy Dimensional Fabric Paint.
I'm very pleased with the results and will be keeping eyes open for more suitable logs for future decor items! It would be good to find slightly larger slices as there are so many images that would work very well for these.
Stamps used are all by Penny Black
The mouse is from Holly Jolly
The robin trio from 'Winter Wonderland'
The hedgehogs are from 'Every Which Way'
Labels:
christmas,
decor,
home decor,
penny black,
stamping,
wood
Friday, December 11, 2015
Warm Winter Feet
These are the snuggliest socks!
I found the pattern here : Bulky Yarn Booty, (the pattern is free btw!)and admittedly, they don't look like much at first glance, but when you slip them on, they are just perfect!
See what a nice shape they have? Also although the ankle rib fits snuggly, it is not tight and slips over the heel very easily. I was concerned that it might be a bit awkward to pull over, so I was very relieved about that.
The yarn I used is Bernat 'Roving' which I found at my local Walmart. It's a lovely yarn, soft, silky and warm. I bought 3 colours for the main 'boots' (1 skein each) and a neutral grey for the finishing. It worked out really well and with 3 colours, the recipients will have no problem knowing which is theirs when these come out of the wash!
Go ahead and give them a try! Bulky Yarn Booty
I found the pattern here : Bulky Yarn Booty, (the pattern is free btw!)and admittedly, they don't look like much at first glance, but when you slip them on, they are just perfect!
See what a nice shape they have? Also although the ankle rib fits snuggly, it is not tight and slips over the heel very easily. I was concerned that it might be a bit awkward to pull over, so I was very relieved about that.
The yarn I used is Bernat 'Roving' which I found at my local Walmart. It's a lovely yarn, soft, silky and warm. I bought 3 colours for the main 'boots' (1 skein each) and a neutral grey for the finishing. It worked out really well and with 3 colours, the recipients will have no problem knowing which is theirs when these come out of the wash!
Best of all - with the bulky yarn and the easy pattern, these are super super quick to knit.
Go ahead and give them a try! Bulky Yarn Booty
Monday, December 7, 2015
Fun Gift Bag For Knitting
I'm not sure whether I get more pleasure from making gifts or from wrapping them!
After finishing the knitting - a lovely hat, the pattern for which you can find HERE
Next I stamped a piece of kraft paper, using Penny Black stamps, from the 'Nine Lives' set. This set is a favourite of mine...the heart is from another unrelated set.
Next I folded a gift bag using an empty cereal box that was a good size for the hat.
Seeing as the project features knitting, I thought the 'Turtle Dove' perfect for my gift!
I sure hope my friend likes and enjoys her gift!
After finishing the knitting - a lovely hat, the pattern for which you can find HERE
Next I stamped a piece of kraft paper, using Penny Black stamps, from the 'Nine Lives' set. This set is a favourite of mine...the heart is from another unrelated set.
Next I folded a gift bag using an empty cereal box that was a good size for the hat.
I folded it flat so that it looks like a gift bag
And in went the hat, wrapped in tissue paper
Some holes in the top of the bag allowed me to tie ribbon through and attach a gift tag to.
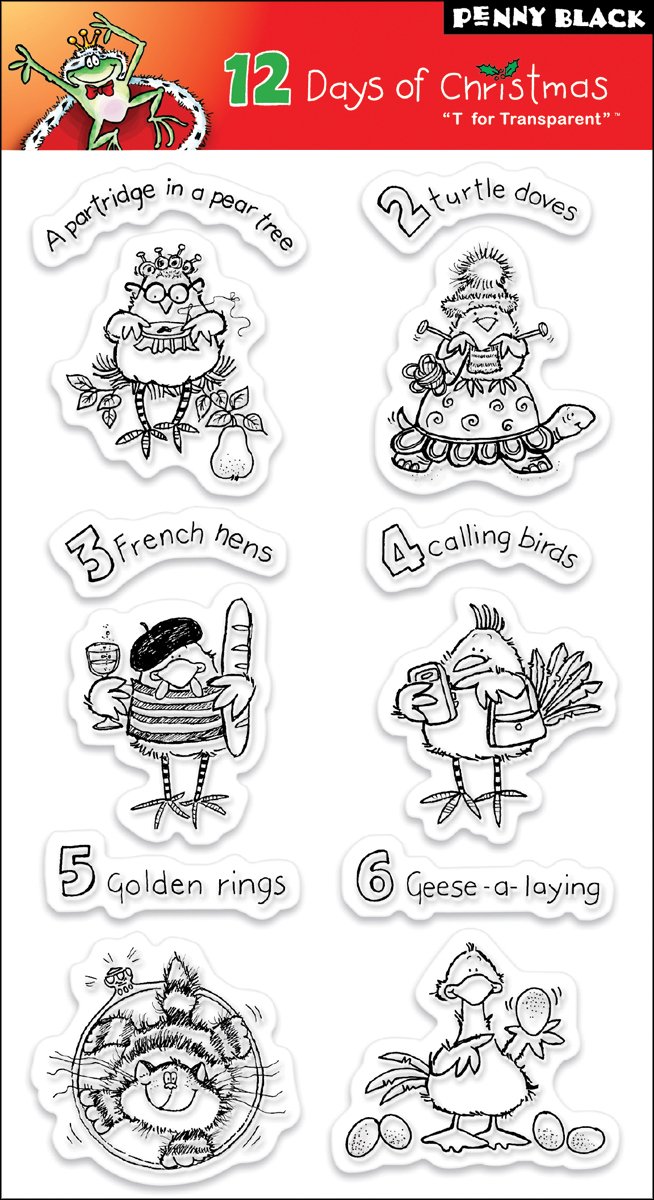
For the gift tag I used an image from the Penny Black set 12 Days Of Christmas. This set cracks me up! I could not find it on the Penny Black site, so I think it may be discontinued. The link is to Amazon.
Seeing as the project features knitting, I thought the 'Turtle Dove' perfect for my gift!
I sure hope my friend likes and enjoys her gift!
Monday, November 30, 2015
Welcome Little One
What a joyful time it is to welcome a new little bundle into the family!
I opted for an easel card as I like the dimension it provides while it is still nice and flat for mailing.
The image I used is from Tiddly Inks, called 'Ellie'
I am submitting this one to the 'Anything Goes' challenge over at Tiddly Inks
I opted for an easel card as I like the dimension it provides while it is still nice and flat for mailing.
The image I used is from Tiddly Inks, called 'Ellie'
I am submitting this one to the 'Anything Goes' challenge over at Tiddly Inks
Saturday, November 28, 2015
Once Upon A Snowflake
What a cute name for a kit... and it sure is a beauty! Oh my!
This is the December Collab over at Plain Digital Wrapper - Once Upon A Snowflake
Here is my page (I hope to do more!) ;-) There's quite a few pages in this kit I tell you!
This is the December Collab over at Plain Digital Wrapper - Once Upon A Snowflake
Here is my page (I hope to do more!) ;-) There's quite a few pages in this kit I tell you!
Friday, November 27, 2015
Little Snow Angels - a Christmas Card
Warm Christmas Wishes - a Christmas card and taking part in a Plain Digital Wrapper Challenge
I used Kimberly Stewart's 'Little Snow Angels' Kit for my card. I find these cards quick to make and very handy to have ready to go before busy December is upon us.
While working with this delightful kit, I decided to make an overlay freebie for you all.
Download HERE and enjoy!
I used Kimberly Stewart's 'Little Snow Angels' Kit for my card. I find these cards quick to make and very handy to have ready to go before busy December is upon us.
While working with this delightful kit, I decided to make an overlay freebie for you all.
Download HERE and enjoy!
Tuesday, November 24, 2015
Santa Trouble
I think Santa has a problem...that sack is way too heavy, the chimney rather tight...and now it is snowing like crazy too. I hope Rudolph will come his rescue quickly...
This tag turned out to be a lot of fun to make! Now I just need to decide who will get it on their package this year.
I used the Gordon Golfer image from Art Impressions
My tag is for the AI Challenge # 173 - Rudolph Red and Evergreen
Edited to add : I'm doing the very happy dance! Santa Gordon won Top Spot in the challenge! Thank you AI folks!
Monday, November 23, 2015
Thanksgiving Freebie
Happy Thanksgiving to our US neighbours for Thursday the 27th!
Let's celebrate with a little freebie overlay!
Download your freebie HERE.
Let's celebrate with a little freebie overlay!
I used Kimberly Stewart's 'Thanksgiving Pilgrims' kit. It is available from Plain Digital Wrapper
Download your freebie HERE.
Wednesday, November 11, 2015
Critter Christmas.
It is that time of the year - Christmas card time. Sadly I find myself making less and less cards all the time. Somehow my friends are not Christmas card senders. Rather a pity that!
But the person who this card is going to, will I know, really appreciate it!
I kept it all very flat as it needs to be mailed internationally, but it opens up and still becomes a decorative piece.
All the papers are from the Recollections 'Sugar Plum' paper pad which I picked up from my local Michaels.
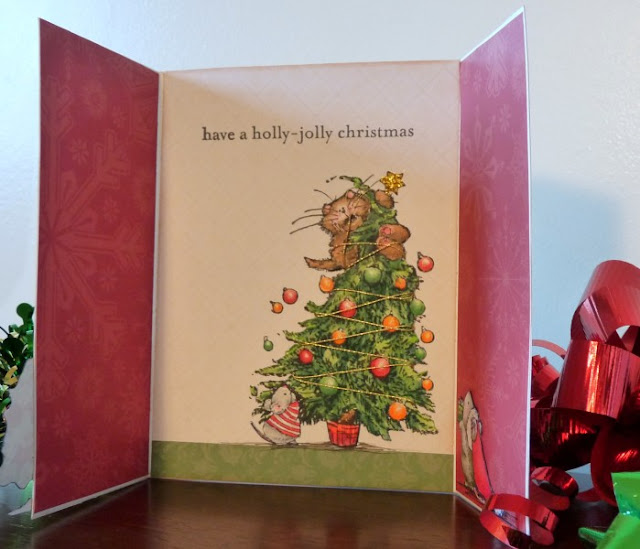
On the left front of this gate fold card I stamped the heart for the sentiment with red ink and embossed is with red sparkle embossing powder. Since the little hedgehog was still debating the tree decor, I added sequin 'balls' to the tree from him.
This fun image of an imminent disaster made me smile while colouring and cutting it. So cute! I stamped the image onto a patterned paper background as well. That way I did not need to cut all the uneven lines and details around the edges. I also wrapped the tree with gold embroidery thread and added a bit of gold glitter to the star.
On the inside of the left flap I added the little mouse bringing a present to put under the tree.
I added a heart shaped paper clip to the front to keep the card nicely closed for mailing.
I could add a note to the inside of the card, or to the back panel.
I`m entering this card to the current AI Challenge 172 - Be Merry
I used images from the Penny Black 'Holly Jolly' Set
and the sentiment on the front is from the Penny Black 'Winter Wonderland' set
Tuesday, November 3, 2015
Pygmy Owl and Autumn Spice...
Recently a Pygmy Owl flew into one of the windows on the house. We got such a fright and were horrified to see the little one lying there, quite lifeless. Hubby picked it up and brought it indoors, hoping that the warmth of his hands and the house will help the little treasure revive.
He was right! Soon the little eyes started to flicker, and we moved outside quickly in case it should fly off. As it is it only sat for a short while before leaving, but long enough for me to take some pictures and for us to marvel at the beauty of God's creation.
Those eyes were like crystal clear glass. Totally mesmerizing! What an amazing experience.
To scrapbook these pictures I used Cathy Krenek's new 'Autumn Spice Kit'. At the writing this is available at Gingerscraps, but will be available at Cathy's GottaPixel store later in the year.
I also used one of the alphas for the page title.
And finally I have a freebie for you! An overlay featuring this 'delicious' new kit. Enjoy!
Download the freebie HERE
Thanks for stopping by!
Subscribe to:
Comments (Atom)


