
Giant Acorn Box

Cross Gift Box

Summer Time and Flowers

Pencil Box

Gift Bag For Knitting

Autumn Decor - Little Scene

Gift Box - Guy

Friends Wall Decor

Sheila Scarf Box
.JPG)
Summer Decor - April 18, 2015
.JPG)
A Teapot of Wishes - March 13, 2015
.JPG)
Christmas album - February 17, 2015
.JPG)
Mail Box Box Card - February 9, 2015
.JPG)
Lots of Hearts Box Card - January 29, 2015
.JPG)
Valentines Card - January 27, 2015
.JPG)
Recycle Coasters Using obsolete CD & DVD disks for something useful
.JPG)
Skating Penguin Fridge Magnet
.JPG)
Ok, we'll take a short break from pianos and teapots. Here is a bit of fall decor. Something for a corner table. It could make a nice centerpiece for the dining table too...
.JPG)
I made the maple leaves from a cut file by Designs on Cloud9 and the imitation Stellar Jay feathers I cut with this file, also by Cloud9 I sprayed them with ink and added more colour with water colour paints.
.JPG)
.JPG)
The sunflowers are bought 'silk' ones. I was going to make some from paper when I remembered I still had these and decided to use them instead.
.JPG)
The adorable lantern is from SVG Cuts' Crisp Days of Fall Collection and holds an LED tea light.
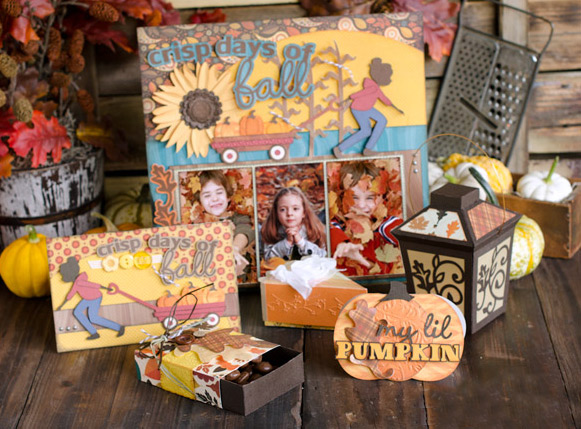
The stand hubby put together...
.JPG)
It was a fun project, and the easiest and quickest part was certainly the lantern ;-)

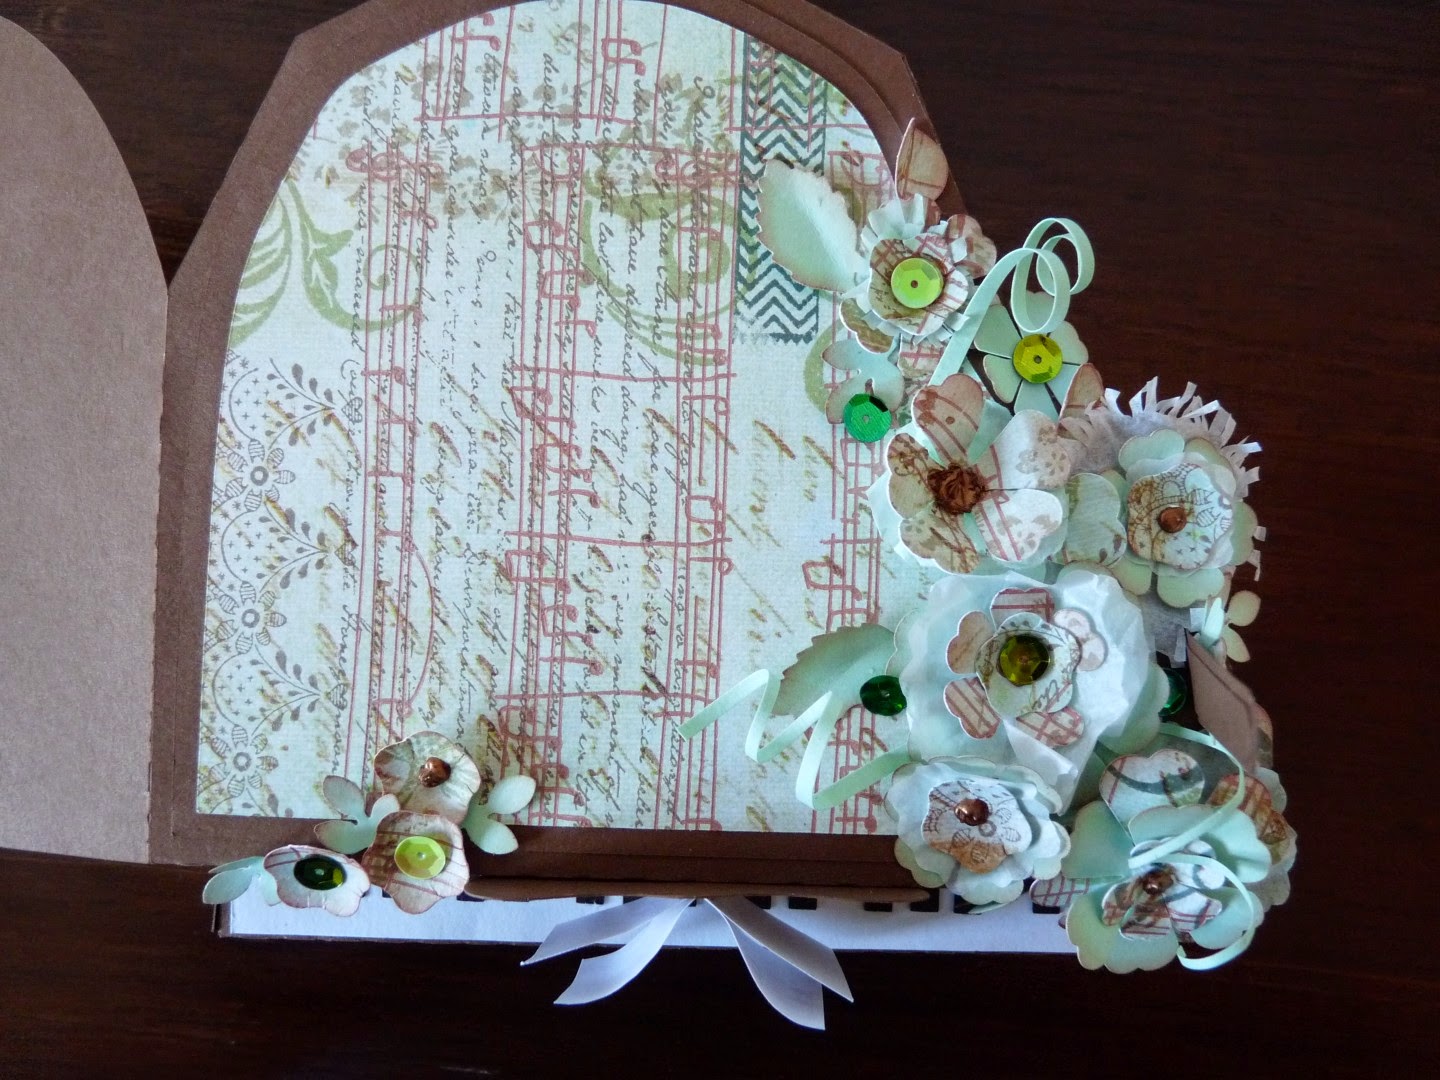
Another piano? Sure...why not?!? LOL Seriously these are fun to make, and I do like the result.
The cut file is from SVG Cut's "Thank You For The Music' Collection
The paper on this is Recollections 'Turquoise Tiles'
.JPG)
It sure won't take long to play this melody ;-)
.JPG)
This time I just tucked a bouquet of roses under the cover...
.JPG)
I made the roses from strips of card stock, added green card stock leaves and just finished it off with florist wire and florist tape. That way I could bundle it into a bouquet, add a small piece of tulle and wrapped it in plastic.
.JPG)
Inside I added a banner featuring a 'What spells Friendship' acrostic poem.
.JPG)
I strung the banner triangles together with (stained) crochet thread, spaced with beads. The back is trimmed with Recollections paper (Mosaic Memories)
.JPG)
Another teapot? Sure, why not? One can never have too many teapots nor too many flowers. (well maybe too many teapots....but flowers? NEVER!)
This paper (by Recollections) was perfect for the pot. I looks like ceramic.Really cool.
.JPG)
From above. A few flowers for the lid...
.JPG)
And close up...these papers are great! (Recollections 'World Traveller')
.JPG)
And finally...I added some goodies inside for my friend. Something for her to explore while enjoying a cuppa!
.JPG)
I used the same cut set as in the post below... Tea For You And Me by SVG Cuts (They are having a Labor Day Sale going on till Sept 7, 2014, 25% off your entire purchase)

I was sorting through scrapbooking papers when I came across a few sheets of these tiny dot papers...and my first thought was teapot and then 'Mary Engelbreit' I think dots and checkers will always remind me of her delightfully whimsical style.
So I got to work using SVG Cut's Tea For You and Me cut files.

As well as some Fancy Flowers and Curly Flowers cut files by Designs on Cloud 9 (these are retiring soon, so get them today at a good price!) Pictures/previews/links for this page have been removed due to designers retiring and stores closing
.JPG)
...and here is the finished teapot. Very decorative and at one point I wondered what I was thinking adding so much stuff...but in the end I'm pleased with the result!
.JPG)
.JPG)
And looking down from above - the 'gem' on the lid handle is by Doodlebug.
.JPG)
And with the lid removed. I thought it may make good storage for paper flowers, made in advance, and waiting to be useful somewhere.
.JPG)
.JPG)
A little bling on the pot's handle...(ugh...and some hot glue strings. I prefer not to use hot glue for these types of projects, but for these flowers it was the easiest adhesive by far)
.JPG)
I did add a few tiny punches to the blue flower centers.
.JPG)
I made a matching cup and saucer. I'm thinking of just making a sprig of flowers to add to the saucer, but we'll see what happens when I get to that!
.JPG)
Tea anyone?
Fridge Magnets - Cute enough not to have to work.
The 3 little crabs from Beach Crabs by Designs on Cloud 9 just 'dared' me to play with them when I first saw them and when I saw a couple bare magnets on my fridge, I knew exactly where these little fellows will be hanging out!
Taking shape on my work desk : The tallest one (with the spade) is 2" 'tall' and the bloke with the shades is the widest at 1.7" . I did consider using googly eyes for these, but maybe that would be better used with these on a card.
.JPG)
Adding the magnets - I added a full size chipboard backing to each of the crabs, edged with black to tidy up the edges.
.JPG)
And here they are, bright and friendly on the fridge door, bringing a smile to my face and definitely too cute to have to 'work'.
.JPG)
I'm planning to make more... I discovered a pile of these magnets in a drawer....
Piano Box
I just finished this little piano box.

I used a cut file from SVG Cut's "Thank You For The Music"

It went together faultlessly. An indication of a first class design.
I decorated my Designer Paper (Prima - Ledger Papers) with stamps, spray inks and some music scores, written with the Silhouette. The original paper is on the right with 'my' version on the left.

This is what the box looked like before I added the flowers.

It looked really nice as is....

But I think one can never have too many flowers.

I used some flowers cut outs from Lettering Delights -'Cut Flower Scallops' and more punched flowers and leaves.
The flowers are just peeking out the front , looking down from above.

The music note paper is from a patterned sheet I had bought from Michaels months ago...

I added a few sequins for flower hearts, but also to subtly catch the light. I did not want bling, but I did want a little sparkle!


I added a single little butterfly to the lid. The wing span is 1" measured on the flat. The file is from "Butterflies", also over at Lettering Delights.

And not to forget, it is a box!

It was so much fun to make this...I could have a row of them. Maybe I should make one for every season ;)
Now there's an idea!!!
Till later folks, I have some crafts to plan ;-)
Pop-Up Box Card as Decoration
.JPG)
Paper crafting is a fun, easy and cheap way to decorate. I like to make little accent pieces for a window sill, shelf or corner table. I thought a pop-up box would make a cute little piece too. My little box can still be folded to mail out, but I do have bits and pieces sticking out beyond the box boundaries, so it will be a little more difficult to fit into an envelope. It does however make it super easy to pack away at the end of summer and store it till next year.
I'm sure it will bring a smile to my face when I unpack it next year!
Looking down inside the 'box'...a little crab is hiding out in there!
.JPG)
A view from the side so you can see better inside the box.
.JPG)
And one to show the embossing I did on the base. I used my 'old school' Fiskars plates and hand held embossing stylus. I find it very relaxing actually, but it does take time...
.JPG)
It's looking quite nice sitting on a little table in the living room!
I followed some tutorials on YouTube to get an idea on the sizes of these boxes, but then it took on a life of it's own. Especially since I did not intend to mail it, I had more freedom in the placement of my elements and in how high I put the umbrella.
The files for the images can be found here : Pictures/previews/links for this page have been removed due to designers retiring and stores closing
Surf Shack
and Beach Stuff
I'm very happy to say that I'm on the SVG Cuts Blog list! The list is a great place to go for lots of inspiration. Click the button on the right to find all the listings!
More company...more 'excuses' to make boxes!
I used the same mini train trunk that I used in the post below and cut it from the Silhouette chip board again. I stamped it with dye ink...sadly I do not (yet) have really nice beach/sea/shell themed stamps. I have no idea how that happened....BUT I still like how this turned out. It has a more tropical feel, even if the hibiscus is blue LOL. I just love that colour blue! Reminds me of the Caribbean sea. This one is the 'Train Trunk' from the Summer Holidays Collection
I teamed it with a card made with Hibiscus designs by Designs on Cloud 9 The writing was again done by the Silhouette and I coloured it with coloured pencil.
.JPG)
.JPG)
.JPG)
The project I'm working on at the moment will take a little while yet before I am ready to post it, so stay tuned!
Well the disruption caused by the computer hassles turned out to take much longer than expected and by then it was time to get ready for company. Now that was the very best of excuses to try out some of the SVG Cuts files I had bought earlier this year.
I selected a couple of boxes from their "Summer Holiday" set and got to work making small gift boxes, stuffed with goodies, for our friends who came to visit.
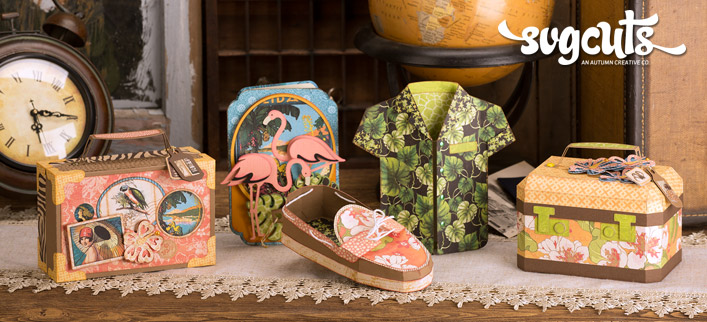
The 'suitcase' was the first one to be completed.
Outside
.JPG) Looking down from above. I liked the way Mary's box looked with the embossed details. Only I have no embosser/die cut machine so I did all the embossing by hand using the -now old style- Fiskars plates and stylus. Although it sure made my hands tired, I found it very relaxing... And then of course I pulled out my chalks. Remember those?
Looking down from above. I liked the way Mary's box looked with the embossed details. Only I have no embosser/die cut machine so I did all the embossing by hand using the -now old style- Fiskars plates and stylus. Although it sure made my hands tired, I found it very relaxing... And then of course I pulled out my chalks. Remember those? .JPG)
And stuffed full of goodies - the hedgehog is a PennyBlack stamp. (and right now the site is giving me hassles, so I will link to another source ) The alphas are cheapies that I picked up from Michaels
.JPG)
I used Bazzill cardstock and some 'Paper Company' cardstock (for the details) The cover sheet is a picture I had printed at Costco after adding the word banner.
Next up was the little train case.
I cut it from Silhouette chipboard. It is really just a cardstock weight, but I like the colour that it has. After cutting it out, I stamped it with Momento Dye Ink and a clear stamp set that I picked up at the Dollar Tree. One of my all time fave stamp sets. Go figure!
.JPG)
Top detail - again, I embossed the details with those Fiskars plates and for the case I decided to make paper roses, cut from a discarded book. I coloured it with the same ink as I used for the stamping and some self made alcohol misting spray.

and stuffed- I used another Penny Black hedgehog stamp here.

I'm ready for the next 'reason' for making more boxes. I was very pleased with the quality of the SVG Cuts designs and of course the Silhouette Cameo did a terrific job cutting everything out.
2 comments:
These are amazing! I can't believe that you make those! Wow!
Too sweet! I think I'll have to invent a reason to stay at your house! You're both gifted and thoughtful! I love the way your heart shines through your "work"!
Post a Comment