Thursday, October 22, 2015

Adorable Squirrel Nut House

I was simply delighted to win the Pink & Main 'Nut House' Stamp and die set through a Facebook draw recently. Aren't those squirrels just the cutest? We have some pretty adorable squirrels who visit us all year long so I'm rather fond of these furry creatures.

Isn't this piece of very happy mail pure inspiration? (even the padded envelope is pink ;-) )


Here's a nice clear image of the stamp set (image linked)


Naturally I had to play with my new goodies straight away. I decided to make  birthday card for a young friend. And then I could also enter it into the Pink & Main October Challenge - Theme Birthday.

I cut the little house (using the dies) twice from brown card stock and added paper pieced details and coloured pencil for shading.
The leaves I die cut from different colours of card stock adding coloured pencil and a bit of glitters (this is for a girl after all!) for added interest.

The squirrel was die cut from white card stock and also coloured with coloured pencils. I gave her a pink nose...girls understand about pink noses!


On the inside I stamped and white embossed a simple birthday greeting (using and older Provo Craft stamp) and then adhered the very top of the two house pieces together. This way the card stands up nicely for display.


I was super pleased with the quality of the stamps and dies. The images stamp beautifully crisp with nice thin lines. Do check out the Pink & Main Store and the new releases full of adorable seasonal images. The Nut House is part of a series of houses btw...what a totally cool idea.

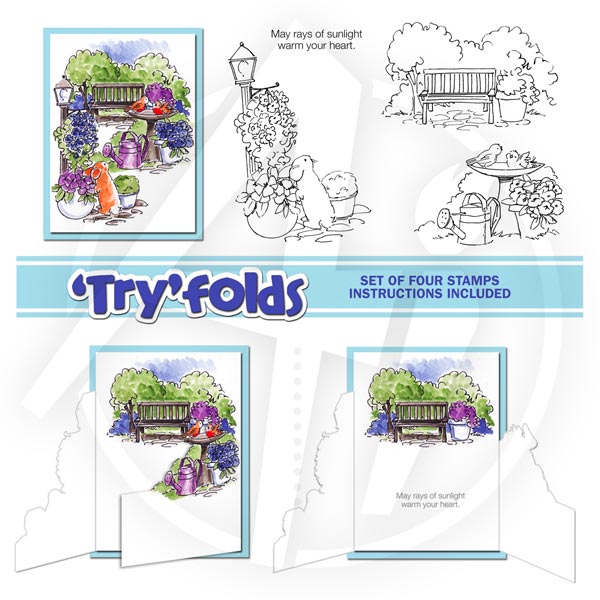
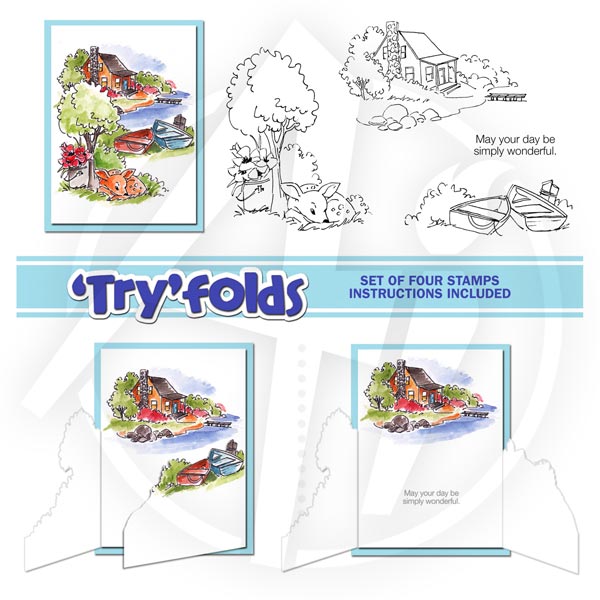
Take a look at these new ones -images are linked- and of course with the dies, they are a breeze to 'cut'!


Hop on over to the blog and check out the Challenge!


I'm also submitting this to :

the Rubber Dance October Challenge (theme is Autumn' and the colours are all perfect for fall)

the Your Next Stamp Colour Challenge 


Tuesday, October 20, 2015

Spinning & Laughing

Ahhhh these girls are having so much fun. I just love to laugh like that. You know...until you're out of breath and your cheeks and stomach hurt...That's the way to do it!


I used the Art Impressions 'Laughing Set' for my card.


Since the set is not designed for spinners I had to improvise the stamp for the back. I stamped the image on copy paper, turned it over on a light table and traced the outline. Then I 'imagined' the backs of the ladies. I adhered the two sides together (sandwiching the string in between) and trimmed it and ran a black line around the edges. 

The idea of the spinner card is that you wind the images around a few times and then pop the card into the envelope. When the recipient opens it up, the image spins around in the aperture. Such a cool idea!


I made a tri-fold card so that the background to the spinner is a plain white, but I still have ample room inside the card to add a little note....or maybe even a good joke! A small strip of the same dotted paper I used on the card front helps to tie it all together.


It was fun to make something different again - I do so enjoy interactive cards with bits that move or pop up and to add some interest!


I'm not happy with the splotchy centers on the punched white flowers...but guess I will have to live with them now ;-)

I made this card for the Art Impressions Challenge #170


Wednesday, October 14, 2015

New Home Box Card

When I heard relatives were moving, I set the brain to work on a 'congrats on your new home' card. But then I thought I would like to make a card that can be a bit of a decoration for a week or two as well...
The answer to that is a box card and the images just had to come from my Art Impressions 'Try-Fold' stamps. They were perfect for the job. I combined two sets (images below) for my card.


The size of the box was based on what I could get out of an 11" piece of card stock, and I just took it from there.

I sprayed the entire white card base with alcohol inks to break up the stark white. I even cut out the house scene. I liked the splattered sky more than the one I had painted. It is too funny how a little run in the ink makes it look like a bit of smoke is coming out of the chimney.


Altogether I have 6 levels on the box, with 2 inserts.


Naturally it took quite a while to plan, colour, cut and put together, but I really enjoyed making it.

These cute little birds make me smile...they are having such fun!


I hope these folks are very very happy in their new home...and I look forward to visiting them and seeing it for myself! Whoooot!


The Art Impressions Sets used :

Garden


and Lakehouse


I am entering this into the Rubber Dance October Challenge

Tuesday, October 6, 2015

Choose a Different Colour!

If only that was all there is to it right? But often that works wonders and is mostly worth the try! (I'm referring to the sentiment on the inside of this card)

 I used a digital stamp/image by Tiddly Inks (love that name!) called 'Annie's Art' for my card. (it is still free at the time of posting this...)


What I like about digi images is the ability to re-size at will, to suit a project. I think that is a big plus. I also like to colour with coloured pencils, so it works just fine with my ink jet printer. For this image though, I was going to do 'no line' colouring, but then did not like how it turned out, so I outlined with black anyway. Most of the colouring here was done using Inktense pencils.

And the inside of the card - with the sentiment I referred to at the beginning.


The sentiment is by Inkadinkado and is called  Friendly Advice. These make me smile...I got mine at my local Michaels store.


Here is another look at the Tiddly Inks image. The black pen was more juicy that I realized....oooops! But then again, it isn't nearly as obvious in real life, unless you take a magnifying glass to it!


I'm entering this card into Challenge #167 over at the Tiddly Inks Blog. The challenge is to feature 'kraft'. Easy for me, I love kraft card stock!